Adding Tickets, Passes & Guest Passes
Coming soon!
Last updated
Coming soon!
Last updated
For events that require a subscription, organisers have the option to further customise the registration process by enabling Require tickets. These options determine the means by which users gain access to an event.
Ticket | Payment is required to gain access to the event. |
---|---|
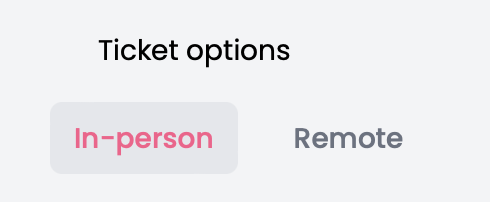
In the event Overview tab, specify whether the event will be Online, Hybrid or In-Person. This will allow you configure ticket options for all the available attendance methods, as shown in the image (ie. online or in-person or both).
In the event Overview tab, specify whether the event will be Online, Hybrid or In-Person. This will allow you configure ticket options
Navigate to the Access tab and enable the following features:
Ticket | Payment is required to gain access to the event. |
---|---|
When creating a new Ticket, you will be asked to specify which payment service will be used. Enter the URL where the user will be redirected for payment to be taken, or connect your Stripe account.
Ticket prices cannot be edited once the ticket has been saved, however, discounts can Gatekeeper controls give you the final say on who is granted access to your event before an attendee's registration is confirmed. These can be set for tickets or passes in any attendance method.
Gatekeeper controls give you the final say on who is granted access to your event before an attendee's registration is confirmed. These can be set for ticket On Success Action
Pre-conditions allow the event organiser to personalise the user journey for different groups of individuals. For example, you may have an exclusive attendance option for a group of VIPs that you only want them to see. You can also restrict access, based on a list of individuals or email domains - such as a company town hall event. Use the toggle to show or hide a ticket/pass from a non-eligible user. When enabled, the ticket option will only be displayed to those that meet the criteria specified.
Pre-conditions allow the event organiser to personalise the user journey for different groups of individuals. For example, you may have exclusive Guest passes that allow users to track and manage invitees to an event.
This feature can only be used on events where:
a pass has already been created; and
the pre-condition of Has Guest Pass is selected.
To entitle a user to manage guest passes, you first need to define relationships between users, company profiles and events.
Create a company profile
Assign the sponsors’ contacts to the company profile
Navigate to Events and select an event
On the Overview tab, select the sponsor of the event
5. Specify a maximum guest pass allowance by entering a quota.
Users that are eligible to receive complimentary guest passes can be managed from within the event settings:
Within the event settings, navigate to Audience
Select Lists.
Create a new list > select Type > Guest Pass.
Note that only one guest pass list can be created in an event.
Users can be added to the guest list in batches (Image 2) according to the sponsor and contact that is offering the pass.
From the lists overview, select the Guest Pass list
Click the Add+ button
Using the dropdown options, select the sponsor and contact
Enter the email addresses of contacts that are eligible for guest passes.
When all email addresses are entered, select Add
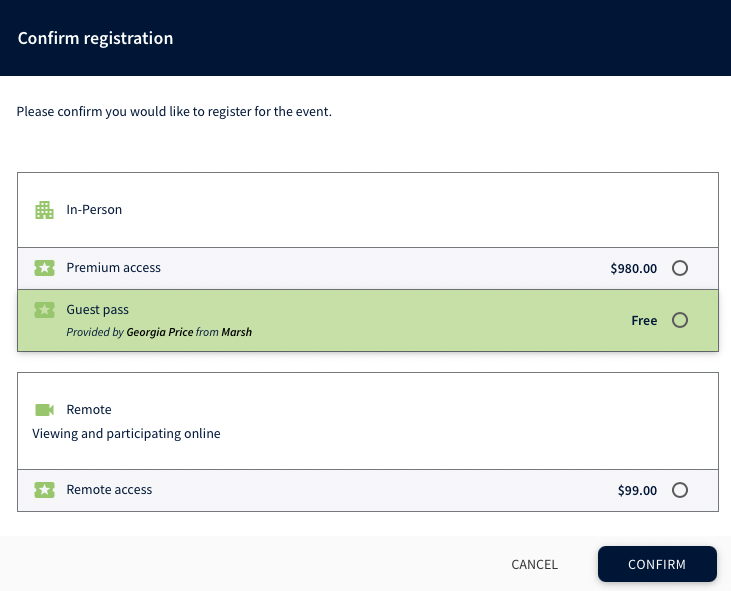
When a logged-in user visits an event website, a banner appears to inform them of their eligibility for a guest pass (Image 3). Clicking to register will reveal a guest pass option (Image 4), including the details of the company and individual that has offered the pass.
Within the event’s ticket options, an organiser can configure what happens after successful registration:
Subscribe - the user will be given access to the content after the completion of the event registration process.
Create registration request - an admin user is required to approve or decline the user’s event subscription (Images 5, 6, & 7).
Admin users can specify whether to show or hide guest passes from non-eligible users:
Hide - the guest pass option only appears to eligible users whose email address is on the guest list
Show - the guest pass option is shown but cannot be selected by non-eligible users.
Guest passes can be assigned to users through a unique URL. When the user lands on the page from one of these links, they are added to the guest pass list.
Note: Only passes that require moderation will be allowed. No quotas can be enforced using this method.
[eventUrl]?gp_ref=[event_id]-[ticket_option_id]-[sponsor_id]-[contact_id]
[eventURL] = the event website link
[eventID] = displayed in the Events listing on Papillon backend
[ticket_option_ID] = displayed bottom left of the Ticket options box where you set the ticket up
[sponsor_id] = displayed in the Company's profile listing
Enter the IDs into the URL string without the square brackets and the message will be displayed you are eligible for a guest pass when you land on the event website.
Show - the guest pass option is shown but cannot be selected by non-eligible users.
Subscribe | The user is registered to the event on successful completion of the process. |
---|---|
Create registration request
The status of registration is set to pending, subject to approval or decline by an admin. You may review and activate approval process emails to keep the user informed about their registration status. Read more about how to approve/decline a registration request. The status of registration is set to pending, subject to approval or decline by an admin. You may review and activate approval process emails to keep the
Pass
Access is granted on a complimentary basis and/or requires approval by an organiser.
Guest Pass
Passes are offered by individuals and companies associated with the event, such as sponsors.
Pass
Access is granted on a complimentary basis, requires approval by an organiser and/or is valid for use as a guest pass.